Follow along on my journey to become a more confident sewer from the dining room table of my NYC apartment.
Showing posts with label RTW Copy. Show all posts
Showing posts with label RTW Copy. Show all posts
Sunday, February 15, 2015
Plaid Pixies!
I must have been thinking happy thoughts, because my Pixie dust is working!
This is my 2nd pair of knock-off J. Crew pixies and I love them. This time around, construction went A LOT faster than the originals. The only glitch occurred when I realized that the plaid had less stretch than my initial pair, and I couldn't get my calves in comfortably. So, I added a 2 inch wide strip of fabric to the side seams and was back in business. I don't think it's too noticeable, right?
I installed a couture hook and eye closure by making the "eye" out of blanket stitches--not quite sure what I think of this method, but I'm glad I tried something new.
I ordered the plaid double knit from Emma One Sock. My blog photos really are terrible quality, but the plaid itself is quite good looking! Since shipping costs were equal to a subway ticket to the Garment District, I plan to order from EOS again soon.
Location:
New York, NY
Sunday, January 25, 2015
Two Wrongs Sometimes Makes it Right!
I do tend to get ahead of myself....What i thought was going to be a simple issue free project turned into a real test to avoid the UFO!
Attempt #1: I set out to tweak the fit of the bodice of my black knit dress and make the next iteration in a green scuba knit from Metro.
With the help of my instructor Sharon, I attempted to remove the bunching around the neckline of the black dress and transfer these changes to pattern paper. We removed some length out of the straps in the hopes that this would rectify the gaping and I also took a small wedge out of the neckline.
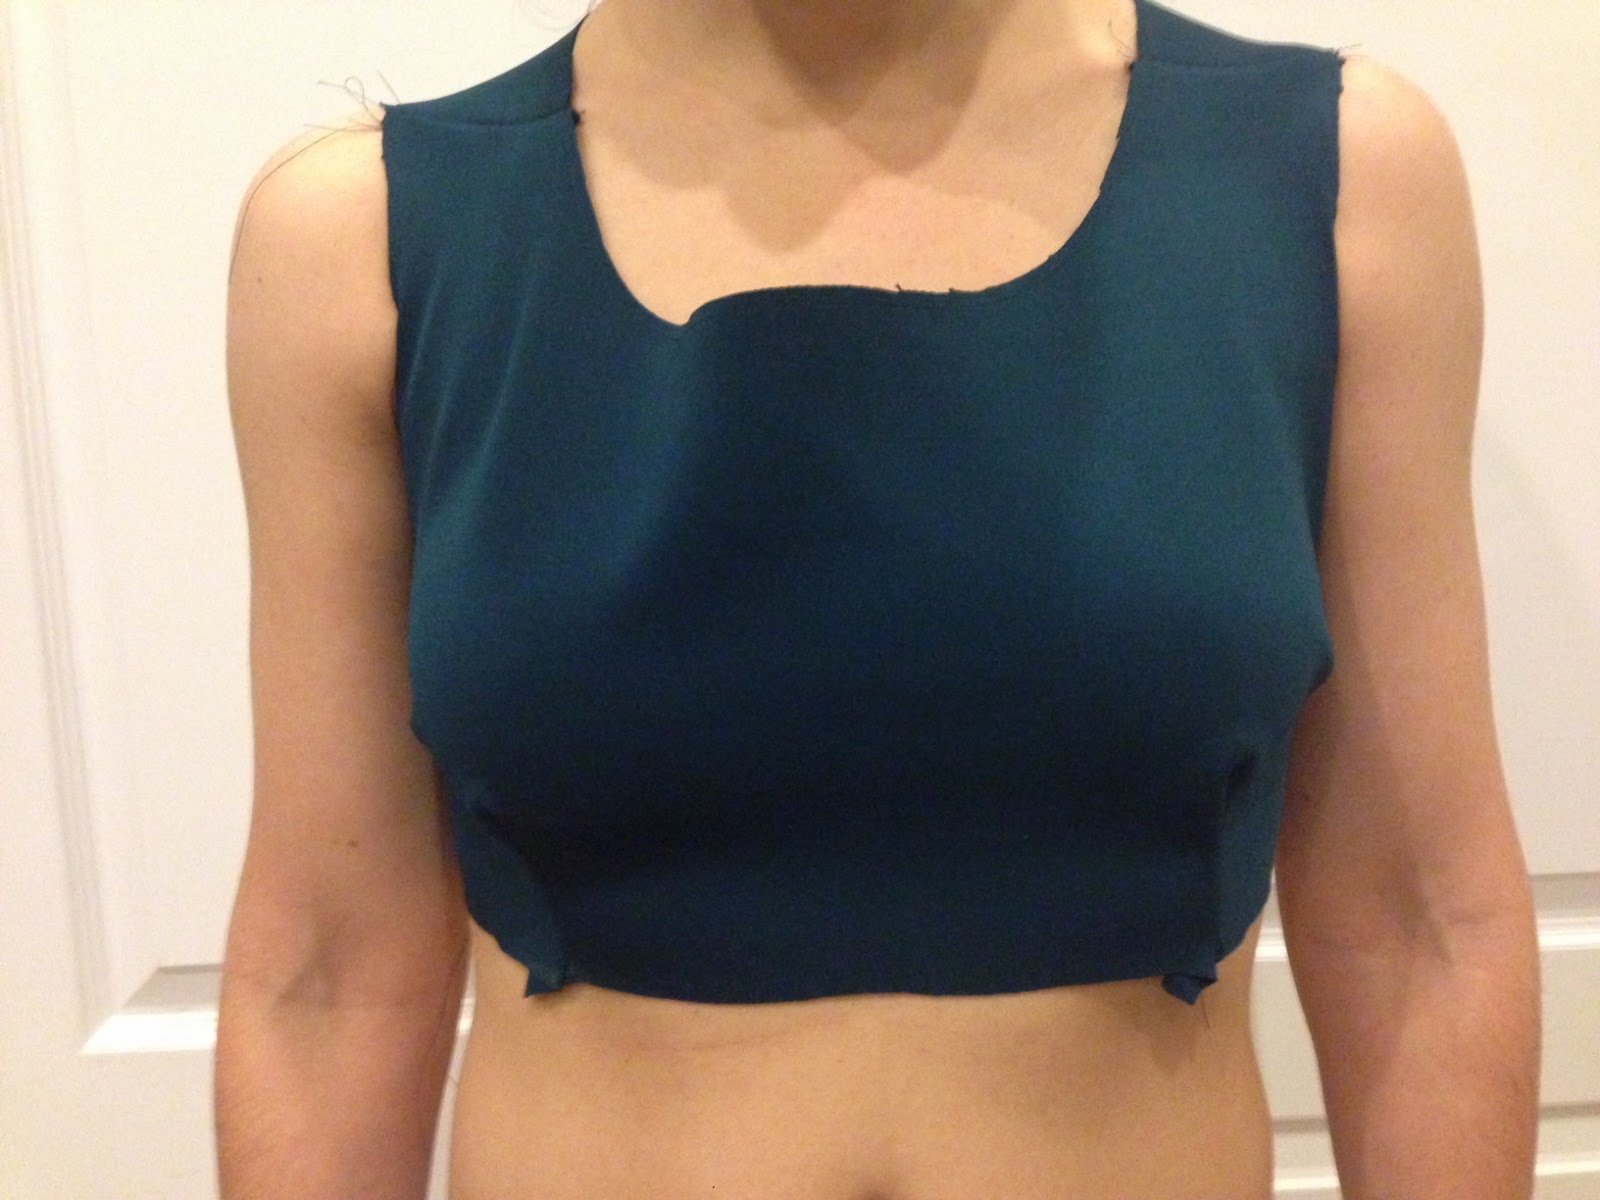
I cut the new bodice and hoped for the best. This was the result:
Attempt #1 was clearly a wadder. Not wanting to waste the skirt fabric that I had already cut out, I decided to make a circle skirt out of the remaining pattern pieces.
The skirt as originally intended was too tight in the waist because of the bodice band.
What to do? I decided to just turn the waistband toward the inside and use it as a facing. Much better...i now had room to breathe.
I struggled top stitching the leather piping until I realized I was using the wrong needle AND foot! I also fought with puckering from the invisible zipper insertion...uggh.
The end result is... meh. I don't love it. But, I don't hate it either.
Attempt #1: I set out to tweak the fit of the bodice of my black knit dress and make the next iteration in a green scuba knit from Metro.
With the help of my instructor Sharon, I attempted to remove the bunching around the neckline of the black dress and transfer these changes to pattern paper. We removed some length out of the straps in the hopes that this would rectify the gaping and I also took a small wedge out of the neckline.
I cut the new bodice and hoped for the best. This was the result:
 |
| Still quite baggy! |
 |
| The fabric is uncomfortably digging into my armpit! |
 |
| Baggy side view |
The skirt as originally intended was too tight in the waist because of the bodice band.
What to do? I decided to just turn the waistband toward the inside and use it as a facing. Much better...i now had room to breathe.
I struggled top stitching the leather piping until I realized I was using the wrong needle AND foot! I also fought with puckering from the invisible zipper insertion...uggh.
The end result is... meh. I don't love it. But, I don't hate it either.
 |
Saturday, January 17, 2015
Pixie Pants 2.0!
Almost 10 years ago, I bought a pair of black J. Crew pixie pants. I have worn those pants to death!
In December, I set out to J. Crew to buy a replacement pair, but returned empty handed. At the store, I realized that the Pixies were not the same pattern or quality as my originals. The original had an exposed zipper nicely finished on the outside with black petersham ribbon (no petersham finish on the new Pixies), and each leg was constructed with three pieces, including a rounded equestrian-style inset which had made me love the pants in the first place (there is no inset in the new version). Furthermore, the pants in stores today didn't feel nice and the high price ($98) annoyed me.
So...to the seam ripper I went! I deconstructed the originals--baggy knees and all--and used the original pieces as a pattern to cut out the leftover black ponte knit from this knit dress. I used a narrow zigzag on my regular sewing machine for all of the construction (no serger) and was sure to interface the facings and stay stitch all the curves. I followed Craftsy's free instructions for the exposed zipper. I found the directions somewhat nonsensical and very confusing, but who am I to say? Still quite the beginner here!!
Although I made plenty of mistakes along the way, I am pretty pleased with the results!
Here are some close ups of the pants:
 |
In December, I set out to J. Crew to buy a replacement pair, but returned empty handed. At the store, I realized that the Pixies were not the same pattern or quality as my originals. The original had an exposed zipper nicely finished on the outside with black petersham ribbon (no petersham finish on the new Pixies), and each leg was constructed with three pieces, including a rounded equestrian-style inset which had made me love the pants in the first place (there is no inset in the new version). Furthermore, the pants in stores today didn't feel nice and the high price ($98) annoyed me.
So...to the seam ripper I went! I deconstructed the originals--baggy knees and all--and used the original pieces as a pattern to cut out the leftover black ponte knit from this knit dress. I used a narrow zigzag on my regular sewing machine for all of the construction (no serger) and was sure to interface the facings and stay stitch all the curves. I followed Craftsy's free instructions for the exposed zipper. I found the directions somewhat nonsensical and very confusing, but who am I to say? Still quite the beginner here!!
Although I made plenty of mistakes along the way, I am pretty pleased with the results!
 |
| Friday night after work at the Morgan Library & Museum |
Here are some close ups of the pants:
Thursday, December 18, 2014
Little Black Knit Dress
This is a copy of an H&M knit dress that I've been wearing for the past few years. I finished it just in time for Thanksgiving dinner!
Although a simple dress to sew, the pattern drafting and fitting wasn't so easy!
Using my seam ripper, I tore the dress apart and then made my first pass at sewing the bodice, cutting straight into my fashion fabric--a Derek Lam ponte knit from Mood. Unfortunately, two things led to my first attempt becoming a de-facto muslin. 1) My iron spewed gunk onto the bodice and I couldn't get it out. Now, I have a new iron! 2) I discovered that the bodice was actually too large on the right side of my body. Sharon, my new sewing instructor, explained to me that the existing pattern (the H&M dress) had clearly stretched from use on the right side. This makes sense, since I am right handed and favor my right side for activity. Thus, the right side was no longer the mirror image of the left side. The stretching of the fabric in the H&M dress was also evident in the waist. On my muslin, the waistband was about 2 inches wider than the bodice. The larger waistband size turned out to be more comfortable, so we added 2 inches to the sides of the bodice pieces.
With Sharon's help, I converted the changes in the muslin to wax paper and then to butcher paper. Now, I was ready to try again! Muslin #2 didn't fit either--the neckline wouldn't lay flat and I needed to take close to 4 inches out of each shoulder seam.
The finished dress still needs some tweaking, but it is wearable! For the next iteration, I plan to take out about 1/2 an inch on the sides of the bodice so that it fits a bit more snug around my torso and deal with the gaping at the neckline.
Don't you love the trim? I picked up this crochet and velvet trim from M&J!
Subscribe to:
Posts (Atom)


