Sunday, February 15, 2015

Plaid Pixies!


I must have been thinking happy thoughts, because my Pixie dust is working!


This is my 2nd pair of  knock-off J. Crew pixies and I love them.   This time around, construction went A LOT faster than the originals.  The only glitch occurred when I realized that the plaid had less stretch than my initial pair, and I couldn't get my calves in comfortably.  So, I added a 2 inch wide strip of fabric to the side seams and was back in business.  I don't think it's too noticeable, right? 


I installed a couture hook and eye closure by making the "eye" out of blanket stitches--not quite sure what I think of this method, but I'm glad I tried something new.

I ordered the plaid double knit from Emma One Sock. My blog photos really are terrible quality, but the plaid itself is quite good looking!  Since shipping costs were equal to a subway ticket to the Garment District, I plan to order from EOS again soon. 


Sunday, January 25, 2015

Two Wrongs Sometimes Makes it Right!

I do tend to get ahead of myself....What i thought was going to be a simple issue free project turned into a real test to avoid the UFO!

Attempt #1:  I set out to tweak the fit of the bodice of my black knit dress and make the next iteration in a green scuba knit from Metro

With the help of my instructor Sharon, I attempted to remove the bunching around the neckline of the black dress and transfer these changes to pattern paper.  We removed some length out of the straps in the hopes that this would rectify the gaping and I also took a small wedge out of the neckline.

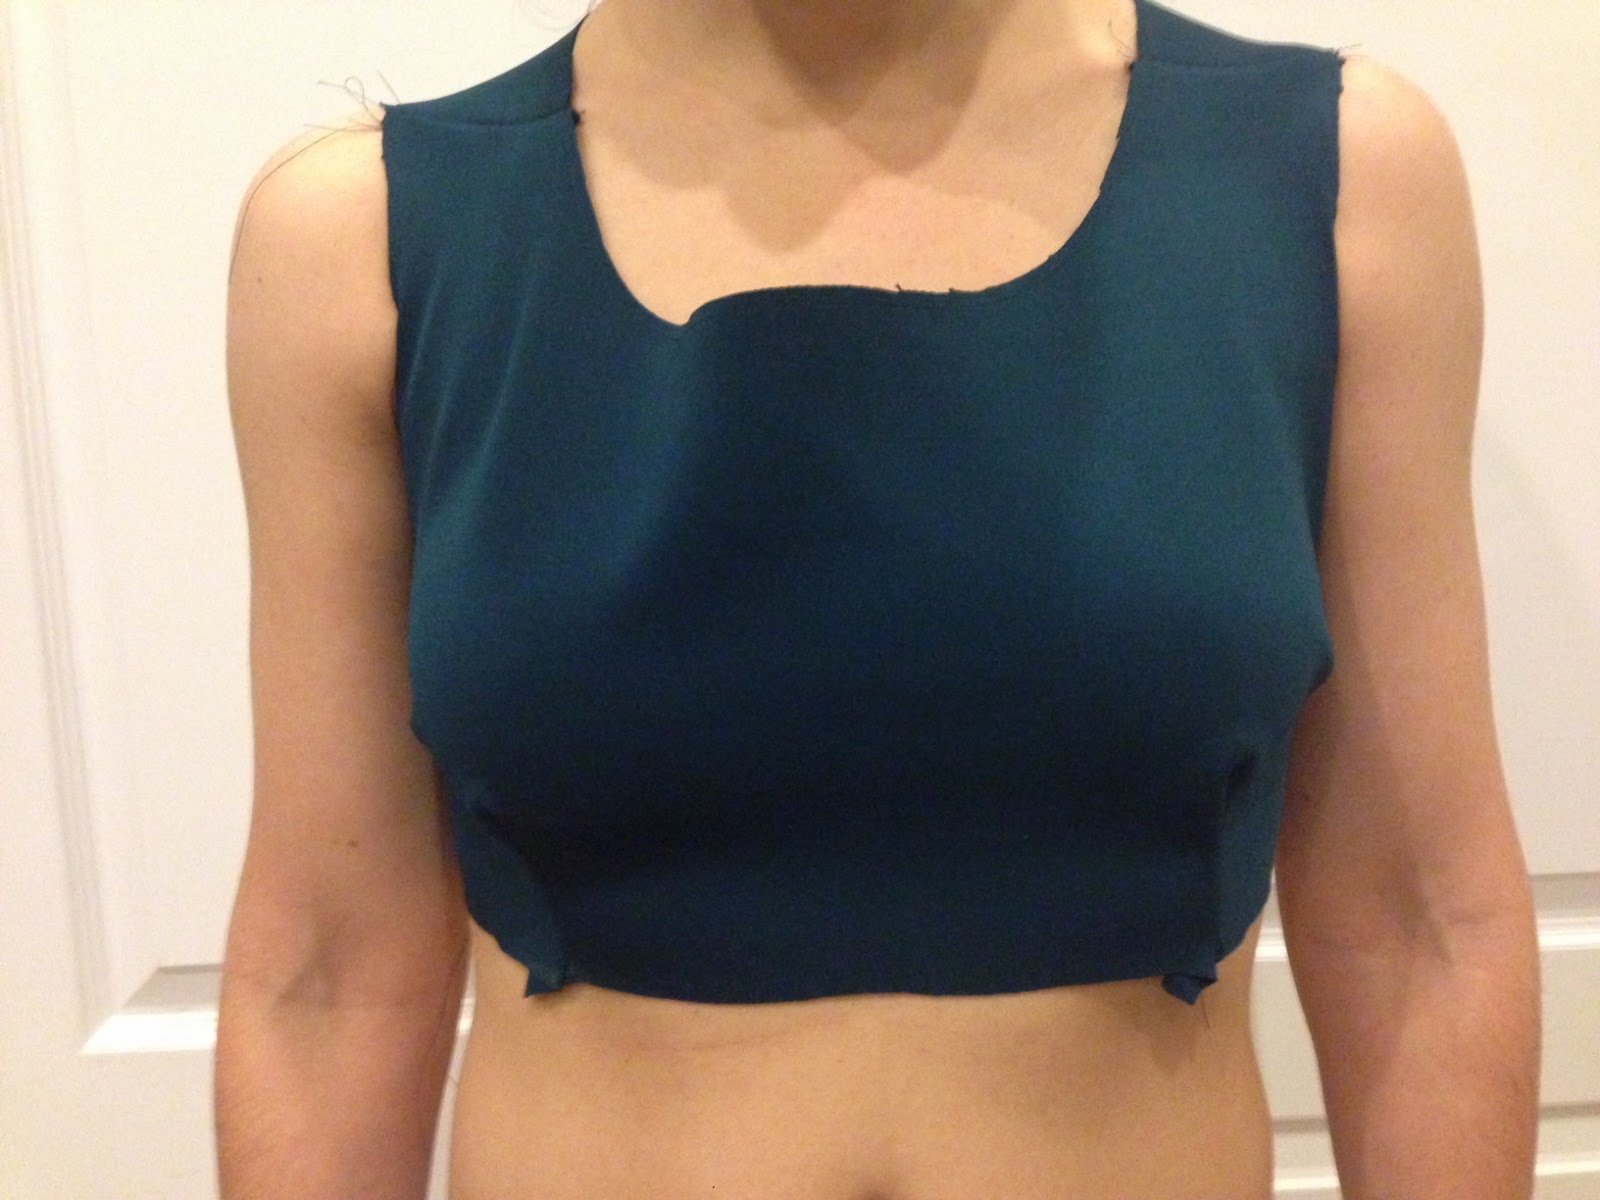
I cut the new bodice and hoped for the best.  This was the result:

Still quite baggy!

The fabric is uncomfortably digging into my armpit!

Baggy side view
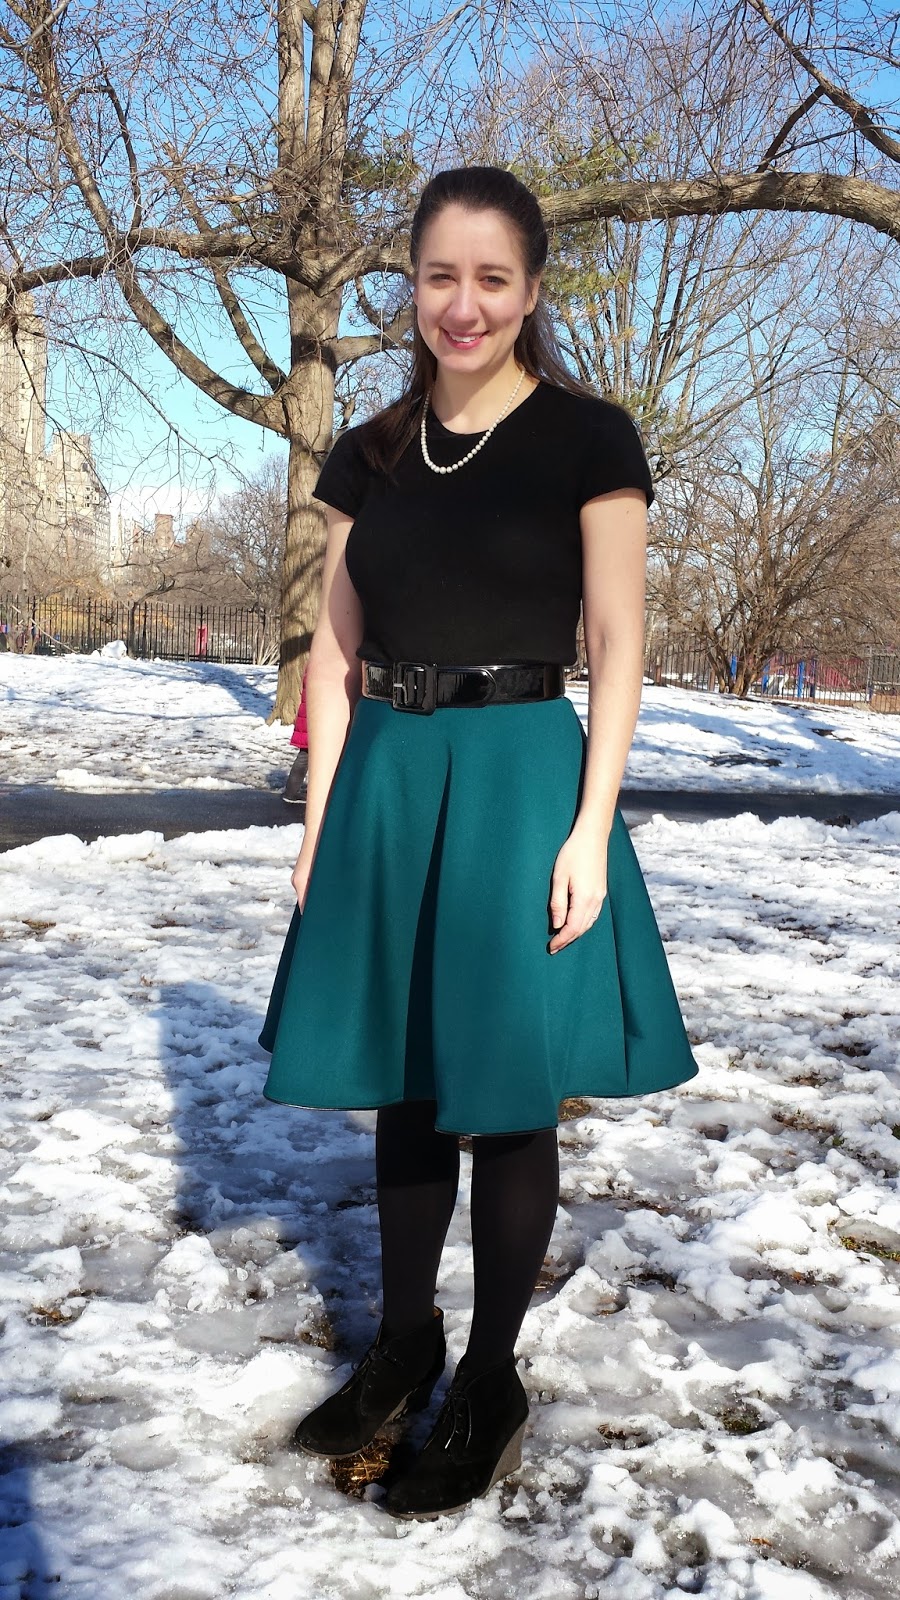
Attempt #1 was clearly a wadder.  Not wanting to waste the skirt fabric that I had already cut out, I decided to make a circle skirt out of the remaining pattern pieces. 

The skirt as originally intended was too tight in the waist because of the bodice band.


What to do?  I decided to just turn the waistband toward the inside and use it as a facing.  Much better...i now had room to breathe. 

 I struggled top stitching the leather piping until I realized I was using the wrong needle AND foot! I also fought with puckering from the invisible zipper insertion...uggh.

 The end result is... meh.   I don't love it.  But, I don't hate it either. 


Saturday, January 17, 2015

Pixie Pants 2.0!

Almost 10 years ago, I bought a pair of black J. Crew pixie pants.  I have worn those pants to death!


In December, I set out to J. Crew to buy a replacement pair, but returned empty handed.  At the store, I realized that the Pixies were not the same  pattern or quality as my originals. The original had an exposed zipper nicely finished on the outside with black petersham ribbon (no petersham finish on the new Pixies), and each leg was constructed with three pieces, including a rounded equestrian-style inset which had made me love the pants in the first place (there is no inset in the new version).  Furthermore, the pants in stores today didn't feel nice and the high price ($98) annoyed me.

So...to the seam ripper I went! I deconstructed the originals--baggy knees and all--and used the original pieces as a pattern to cut out the leftover black ponte knit from this knit dress.   I used a narrow zigzag on my regular sewing machine for all of the construction (no serger) and was sure to interface the facings and stay stitch all the curves.  I followed Craftsy's free instructions for the exposed zipper.  I found the directions somewhat nonsensical and very confusing, but who am I to say?  Still quite the beginner here!!

Although I made plenty of mistakes along the way, I am pretty pleased with the results!

Friday night after work at the Morgan Library & Museum


Here are some close ups of the pants:


Monday, January 12, 2015

Setting the Stage for 2015

This year I am participating in the Goodbye Valentino 2015 RTW Fast and Colette's Wardrobe Architect challenge.  I am hoping that the Wardrobe Architect Challenge will help me to define and reflect on my core style and that the RTW Fast will help me execute it.


Here are my responses to two prompts from the first round of Wardrobe Architect questions:

Thursday, December 18, 2014

Little Black Knit Dress


This is a copy of an H&M knit dress that I've been wearing for the past few years. I finished it just in time for Thanksgiving dinner!

Although a simple dress to sew, the pattern drafting and fitting wasn't so easy! 

Using my seam ripper, I tore the dress apart and then made my first pass at sewing the bodice, cutting straight into my fashion fabric--a Derek Lam ponte knit from Mood.  Unfortunately, two things led to my first attempt becoming a de-facto muslin.  1) My iron spewed gunk onto the bodice and I couldn't get it out.  Now, I have a new iron! 2) I discovered that the bodice was actually too large on the right side of my body.  Sharon, my new sewing instructor, explained to me that the existing pattern (the H&M dress) had clearly stretched from use on the right side. This makes sense, since I am right handed and favor my right side for activity.  Thus, the right side was no longer the mirror image of the left side.  The stretching of the fabric in the H&M dress was also evident in the waist. On my muslin, the waistband was about 2 inches wider than the bodice.   The larger waistband size turned out to be more comfortable, so we added 2 inches to the sides of the bodice pieces.  

With Sharon's help, I converted the changes in the muslin to wax paper and then to butcher paper.  Now, I was ready to try again!  Muslin #2 didn't fit either--the neckline wouldn't lay flat and I needed to take close to 4 inches out of each shoulder seam. 

The finished dress still needs some tweaking, but it is wearable!  For the next iteration, I plan to take out about 1/2 an inch on the sides of the bodice so that it fits a bit more snug around my torso and deal with the gaping at the neckline. 

Don't you love the trim?  I picked up this crochet and velvet trim from M&J! 


Tuesday, October 21, 2014

Pants Party!

I MADE A PAIR OF SEMI WEARABLE PANTS!

In May, Lauren from Lladybird announced that she would be in NYC to teach a pant-making workshop. I immediately signed up!  In mid-August, I ventured into Brooklyn to Jennifer's Workroom Social for the weekend...and emerged Sunday evening with a decent fitting wearable muslin! 


Using Palmer/Pletsch's 6901, we got to work fitting the pre-assembled muslins.   I only had to make a few adjustments to the pattern, most notably removing some of the length out of the front. 

I used stretch sateen from Paron and made the pockets out of a beautiful cotton print bought in Venice in 2008.

It was both a humbling and invigorating weekend! I have much to learn to become a more competent sewer.   Either way...it was a great experience and I was so inspired by all the kind, interesting and competent women with whom I shared the weekend. Plus, I met the lovely Lauren--- my first "sewing celebrity." 
Lauren (wearing a Zinnia skirt and papercut wrap top) demo-ing the zipper insertion


The pattern was a bit too high-waisted for my taste and I don't anticipate that these pants will make it out of the apartment. I have my eyes on the lower-waisted Thurlow trouser pattern for my next pair.  Stay Tuned!  

Saturday, September 13, 2014

Conquering Upholstery

It's finally finished!

This was a true labor of love.  I stabbed my hands with a thousand pins, bent many upholstery needles and pins, ripped out and restitched too many seams to count, bruised my hands from the staple gun, and jammed my sewing machine at least a dozen times. All in, this project probably took 40 hours.  And, I am so proud of the results!

In 2011, Michael bought a $10 Craigslist chair for his grad school apartment. I hated everything about his apartment, and wanted no reminders of those two years of long distance--chair included.  In spite of my protests, he brought the chair with him when we moved to NYC together last summer.  

Since we were not willing to shell out for a professional re-upholstery job or invest in a new chair, the only option was to DIY.  I quickly convinced Michael that I could knock the project out in "one long weekend" with his engineering help.  Little did he know, I had no idea what I was talking about...

We started fabric shopping at Zarin's in Chinatown and made multiple trips to the garment district, returning home with swatches each time.  But, we weren't able to find anything we liked.  Finally,  at Mood last September, we found the perfect suite of fabrics to re-do the seats of our dining room chairs (finished!), upholster the chair (halleluja!), build a DIY coffee table ottoman (finished!), and make coordinating throw pillows (stay tuned!).


The chair fabric stayed in my closet for 3+ months, as I found excuse after excuse not to start. On New Year's day--4 months BEFORE our wedding--we plunged in.  The chair is comprised of four pieces: two arms, the rounded back, cushion and many yards of piping. Using my trusty seam ripper, I removed all of the existing upholstery and Michael used the old fabric as a template to cut the new.  I painstakingly removed the 2 inch bias-cut fabric around the piping so that I could encase the existing cording in velvet bias strips for the new piping. Once all the fabric was cut, I labeled Ziploc bags for each piece (left arm, right arm, back, cushion) and we stuffed the Ziplocs with the template, the newly cut fabric, and the corresponding velvet piping. The steps up until this point took us the better part of an entire weekend, the two of us working side-by-side.

The original fabric is on the back piece of the chair and the new fabric is already stapled to the front edge of the chair.  
  
When I first attempted to sew the new back piece in late January, my Brother machine (sans walking foot) quickly let me know who was boss. Let's just say there was lots of broken needles and cursing.  I persevered and *mostly* sewed the piping to the rounded edges. The chair back sat in the corner of our living space for the next five months while we attended to wedding preparations. 


After the dust settled from the wedding, we picked the project back up earlier this summer.   This time, I had a new Bernina 1008--birthday present from Michael.  In late June, I headed to  City Sewing to buy a walking foot.  Over two separate weekends in June and early August,   I worked on the arms of the chair.  Each arm consisted of three pieces of fabric and two sections of piping.  The fabric is stapled on the underside of each arm.   From there, I redid the rounded corners on the chair back and made the zippered seat cushion.  The contours of the arms and back are still not perfect, but I am satisfied with the results. 

Michael took it from here... he put the three pieces of the chair back together.  This involved lots of screws, nuts, and bolts, and the stapler.  He then placed a new tack strip (purchased at Mood) on the chair back to hold the final piece of fabric. 


We are both so proud of our new chair!